HANOI DROID

The Full Story
Timeline
Witness the journey of completing this project in just 14 weeks.
Week 1
Establishing a clear project scope and devising a plan to test the hardware.

Week 2
Initiated the writing of code essential for testing the robot.


Week 3
Discovered a power supply that delivers enough power, meeting the robot's requirements without relying on batteries.
Week 4
Initiated robot testing and swiftly resolved issues, including fixing connections, addressing faulty servos, adjusting feedback potentiometer directions, and commencing the assembly of the new head.


Week 5
Completed the assembly of the head and resolved the "head rotate" issue. Started to explore options and the acquisition of parts for a new enclosure and a revamped control system. The aim is to have more PWM pins, a more compact design, and increased ease of control, all managed seamlessly with just one microprocessor instead of two.


Week 6
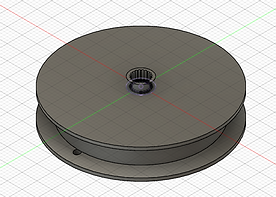
Created a pulley system for lifting disks using Fusion 360, designed a new enclosure with AutoCAD, and finalized the schematic for the innovative controlling system.

Week 7
Started the process of bringing the designs created in the previous week to life by laser cutting the acrylic sheets for the enclosure, 3D printing the parts for the pulley system, and breadboarding the new controlling system together with the installation of the fully assembled face.
Week 8
Tested the new enclosure and pulley system, then worked on further modifying the design to adapt it to the robot limitations. Started The PCB design After seeing the Breadboarded test was successful.

Week 9
Completed the assembly enclosure and successfully integrated the pulley system. Also, finalized the code designed to operate seamlessly with the new PCB, Adafruit servo drivers, and Arduino.

Week 10
Received the final revision of the PCB, initiated face tracking and speech recognition development. Implemented a new pickup system to replace the pulley system.


Week 11
Placed an order for the PCB and completed the initial face tracking script.
Week 12
Received and tested the PCB. Progressing with the face tracking code and refining the movement code, involving Arduino, Python, and state machines.


Week 13
Designed and printed the enclosure for the PCB, started the state machine code that integrates the disk detection, face detection
Week 14
Here will go the text for week 14


